

If this is your fist time visiting my blog, let me introduce myself...my name is Belinda and I am a needlework and quilting designer, teacher, creator, and finisher - my company is called Blue Ribbon Designs. Working with a needle is truly my passion, obsession, and career. One of my favorite endeavors is designing and creating samples for AccuQuilt.
First, let me start by introducing you to the GO! Big Electric Fabric Cutter. The GO! Big is the latest and greatest addition to AccuQuilt's fabric cutter line...and did you see the keyword in it's name??...it is (drum roll) ELECTRIC...yep, that's right, no more cranking a handle - this electric fabric cutter does all the work for you! When I first saw the video for this spectacular fabric cutting machine, I nearly had to pick my jaw up off the floor...it is pretty impressive. Don't get me wrong, I adore my other three fabric cutters, but there is something special about this larger, faster, unique cutting system...I mean, who doesn't like to be on the "cutting edge"....

First of all, it is extremely simple to set-up, right out of the box....it is 23 pounds, which for me is easy to handle and easy to store...but you may wish to have it in a designated space...

ALL GO! Dies can be used in the GO! Big...and did I mention you can cut two 6” wide dies side by side at the same time?? In addition to the HUGE GO! die library, there are 5 NEW GO! Big dies that are used exclusively with the GO! Big... these die boards allow you to cut a whopping 12 ½” finished block with just one die (these five new dies include: GO! Big Square-10" (9 1/2" Finished), GO! Big Circle-4", 6", 7", 8", GO! Big Churn Dash-12" Finished, GO! Big Snail's Trail-12" Finished, and the GO! Big Double Wedding Ring-12 1/2"). I need to start saving my pennies, as all of the GO! Big dies are now on my wish list!


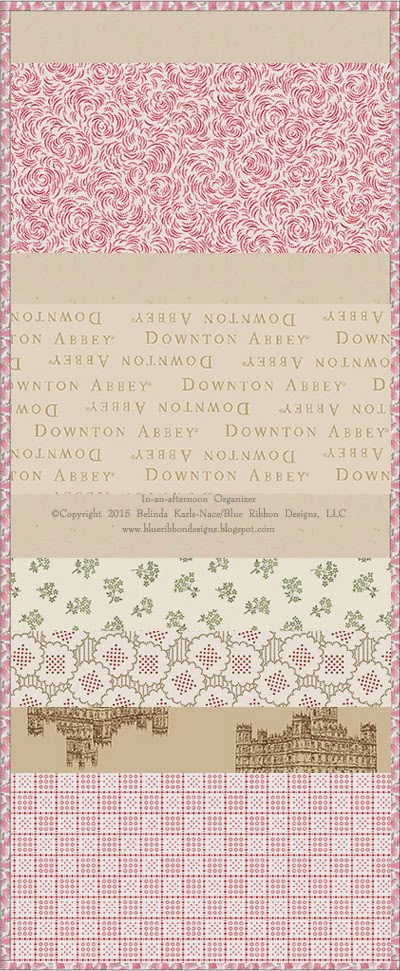
My project tutorial features the GO! Big Square-10" (9 1/2" Finished) cutting die...and the wonderful folks at Andover Fabrics provided inspiration in the form of fabrics from their Downton Abbey collections (Downton Abbey - Logos and Labels and gorgeous prints from Downton Abbey - The Downstairs Collection). Once I knew my feature would be on the GO! Big Square and I saw the Downton Abbey fat quarters, I knew immediately what my project would be - a simple, yet useful wall organizer. Now, I know a square may seem a little bit boring compared to the other four new GO! Big dies...but is extremely versatile...and I think you will be quite amazed with what you can do with it...and I know I usually use bright and cheerful fabrics, but it was fun to step outside my box for this project...
Before I give you the instructions for the project, I thought I would show you just how simple it is to cut shapes perfectly and accurately with the GO! Big...here is a little video I shot in my studio...and what makes it most impressive - I shot this video with my smartphone, holding it in one hand while I cut a stack of GO! Big Squares (not a top quality video, but you get the idea)...that is just how easy it is to use the GO! Big...
We've learned all sorts of details about the GO! Big, so let's get right into my project tutorial (I know it's what you have been waiting for)...click on any image(s) for an enlarged view...

In-an-afternoon Organizer
A project/tutorial designed especially for the GO! Big Electric Fabric Cutter
Finished Size: 10" x 25"
A project/tutorial designed especially for the GO! Big Electric Fabric Cutter
Finished Size: 10" x 25"
GO! DIES USED
- GO! Big Square-10" (9½" Finished) (55451)
- GO! Square-4½" (4" Finished) (55018 or 55060)
- GO! Strip Cutter-2" (1½" Finished)(55025) or your favorite width for binding
FABRIC REQUIREMENTS
- KonaCotton by Robert Kaufman Fabrics - Natural - ⅔ yard
- 6 assorted Downton Abbey prints by AndoverFabrics - 1 fat eighth each
- 1 Downton Abbey print by Andover Fabrics - 1 fat quarter or ⅙ yard (binding)
- Fusible Fleece or Batting - ⅔ yard (model uses fusible fleece)
CUTTING DIRECTIONS
Kona Cotton by Robert Kaufman Fabrics - Natural:
- Cut 2 - 10” x 25” rectangles
- Cut 2 - 4½" (4" finished) squares
Assorted Downton Abbey fabric prints by Andover Fabrics:
- Cut 6 assorted - 10" (9½" finished) squares
Downton Abbey fabric print by Andover Fabrics:
- 2" (1½" Finished) strips (or your favorite width for binding)
- 5 strips if using a fat quarter
- 2 WOF strips if using yardage
Fusible Fleece or Batting:
- Cut 1—10” x 25” rectangle
- Cut 6—10” x 5” rectangles (you can cut three 10" squares with the GO! Big Electric Fabric Cutter and then sub cut each in half)
SEWING DIRECTIONS
1.
Layer one 10”
x 25” rectangle of fusible fleece (or batting) between two 10” x 25” rectangles
of Kona Cotton Natural. Fuse or pin baste fabric sandwich. Quilt as desired (I
used 2” cross hatches).

2.
Press
all six 10” squares of Downton Abbey prints in half. Place one 10” x 5”
rectangle of fusible fleece inside the fold of each pressed in half fabric
square. Fuse or pin baste fabric sandwiches. Quilt or topstitch if
desired (I did a topstitch ¼” from the fold). These will be your six pockets.

3.
Measure down 6” from the top of the 10” x 25” quilted rectangle (base) and
place the long raw edge (not the fold) of one pocket rectangle. Pin and sew in place using a ¼” seam.

4.
Fold pocket up towards the top of the base and
press. Baste sides of the pocket in place using a ⅛” seam allowance (your
binding will cover these stitches).
5.
Measure down 5½”
from the bottom of the first pocket and place the long raw edge (not the fold)
of one pocket rectangle. Pin and sew in
place using a ¼” seam.

6.
Fold pocket up towards the first pocket and
press. Baste sides of the pocket in place using a ⅛” seam allowance (your
binding will cover these stitches).
7.
Measure down 5½”
from the bottom of the second pocket and place the long raw edge (not the fold)
of one pocket rectangle. Pin and sew in
place using a ¼” seam.

8.
Fold pocket up towards the second pocket and
press. Baste sides of the pocket in place using a ⅛” seam allowance (your
binding will cover these stitches). OPTIONAL: After basting the sides of pocket three, stitch dividing lines to make this pocket have several sections - the model was divided into four pockets.

9.
Measure down 2¼”
from the bottom of the third pocket and place the long raw edge (not the fold)
of one pocket rectangle. Pin and sew in
place using a ¼” seam.

10.
Fold pocket up towards the third pocket and
press. Baste sides of the pocket in place using a ⅛” seam allowance (your
binding will cover these stitches).
11.
Measure down 2¼”
from the bottom of the fourth pocket and place the long raw edge (not the fold)
of one pocket rectangle. Pin and sew in
place using a ¼” seam.

12.
Fold pocket up towards the fourth pocket and
press. Baste sides of the pocket in place using a ⅛” seam allowance (your
binding will cover these stitches).
13.
Place the final
pocket even with the bottom of the base, covering part of pocket five and baste
in place using a ⅛” seam allowance (your binding will cover these stitches) on three sides, leaving top of pocket open.

14. Fold one of the 4½" squares in half diagonally (forming a triangle) and press. Place the folded square in the top left corner on back of the organizer, matching raw edges with the edges of the organizer and baste in place using a ⅛” seam allowance (your binding will cover these stitches). Repeat with the other 4½" square, basting it in the top right corner on the back of the organizer. These corner triangles on the back of the organizer are "back pockets" for hanging. I inserted a wooden slat (9" x 1½" x ¼”) with a sawtooth hanger (easily made with supplies purchased at a hardware store). You may choose to make a traditional sleeve instead.


15. Add binding, mitering corners.
15. Add binding, mitering corners.


I hope this blog hop post will entice you make an In-an-afternoon Organizer (or two) of your very own...and if you do, please share a photo with me - I would love to see your interpretation!
I want to thank you for visiting my blog today - I hope you have enjoyed your stay....are you feeling inspired?? I sure hope so!...and this is just one stop...there are nine other stops on this AccuQuilt GO! Big Blog Hop - all guaranteed to give you fresh new ideas - I personally follow all of the blogs on this impressive list, they are all worth a visit...
- Monday 02/23 Beaquilter: http://www.beaquilter.com/ - GO! Big Snails Trail
- Tuesday 02/24 The Zen of Making: http://www.thezenofmaking.com/ - GO! Big Circle
- Wednesday 02/25 May Chappell: http://www.maychappell.com/ - GO! Big Double Wedding Ring
- Thursday 02/26 Cut To Pieces: http://cuttopieces.blogspot.com/ - GO! Big Churn Dash
- Friday 02/27 Pleasant Home: http://www.pleasant-home.com/ - GO! Big Square
- Saturday 02/28 Free Motion by the River - http://www.conniekresin.com/ - GO! Big Snails Trail
- Sunday 03/01 A Quilting Life: http://www.aquiltinglife.com/ - GO! Big Churn Dash
- Monday 03/02 Blue Ribbon Designs -YOU ARE HERE - GO! Big Square
- Tuesday 03/03 Sew Many Ways: http://sewmanyways.blogspot.com/ - GO! Big Double Wedding Ring
- Wednesday 03/04 Simple Simon and Co.: http://www.simplesimonandco.com/ - GO! Big Churn Dash
Be sure to explore my blog to see many more AccuQuilt projects and finishes...and please stop back soon...
What a fun organizer!
ReplyDeleteYour video really shows how easy it is to use the GO! BIG! Fantastic tutorial for the organizer Belinda, now I want to make one of those, thanks for sharing!
ReplyDeleteI just loved your project!! I think that is the most fun thing about a blog hop is to see exciting "what a great idea" projects. You're video was great so we could see the cutter actually cut the 6 perfect squares! :-)
ReplyDeleteGreat review and thanks for sharing your lovely organizer.
ReplyDeleteVery nice job, Belinda! What a great organizer. You make it look so easy.
ReplyDeleteWhat a fun project you created, Belinda! I know you are enjoying the GO! Big very much!
ReplyDeleteRobin
I was just telling my quilting buddy that I need an organizer something like this!! Perfect timing!!
ReplyDeleteI love this organizer-great idea of course from my creative friend.
ReplyDeleteOooh I need one!!! And it looks so easy to use too!!
ReplyDeleteLove what you have done, love the step by step guide, it's very good and easy to follow.
I feel so inspired to want to make this... I will have to book mark it until I am able to sit at my machine... But thank you it's marvellous.
Smiles :)
Fantastic, just got my Go Big in February! Love your project, even though I don't have thes dies yet, I will be making your project!! Thanks for sharing
ReplyDeleteWonderful idea, can't wait to make mine. Thanks for sharing.
ReplyDelete