Showing posts with label gift tags. Show all posts

Wednesday, May 15, 2024

Nifty No-Sew Fabric Tags

Nifty No-Sew Fabric Tags ©Copyright 2024 Belinda Karls-Nace/Blue Ribbon Designs, LLC http://www.blueribbondesigns.blogspot.com
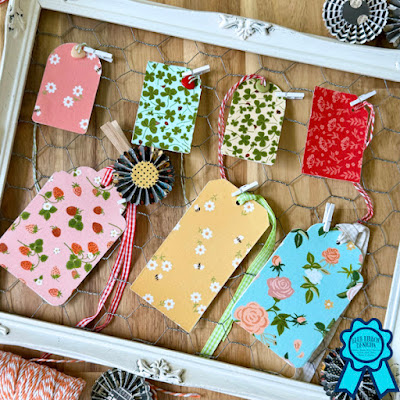
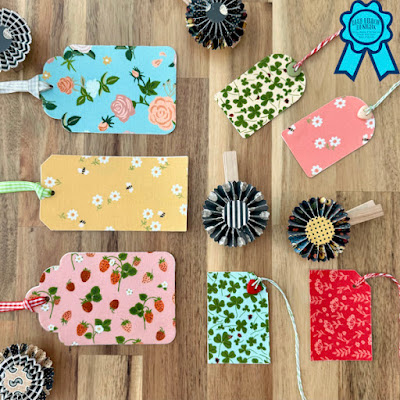
Greetings friends! It is new project tutorial day - time to share my May project created for Therm O Web with you! I always enjoy putting on my Fabric Education Designer hat and creating new projects/tutorials to share with you on the Therm O Web Blog. Each month, I share a new project and you give you my tips and tricks for using their adhesives and interfacings. For the month of May, the blog is focused on quick projects for gift giving, kitchen sewing, and sewing for kids. I created a brand new project that was posted yesterday - it is a complete project tutorial for my "Nifty No-Sew Fabric Tags." My comprehensive tutorial contains a complete supply list, printable pattern with templates, and step-by-step directions with color photos. This is a fast and easy "no-sew" project, perfect for using up scraps and great for beginners. I chose to use some cheerful fabrics from the Promise Me collection by Michal Marko for Poppie Cotton. I hope you will stop by the Therm O Web blog and check out my project and tutorial...

Nifty No-Sew Fabric Tags ©Copyright 2024 Belinda Karls-Nace/Blue Ribbon Designs, LLC http://www.blueribbondesigns.blogspot.com

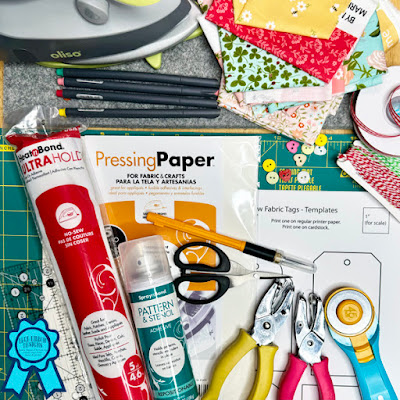
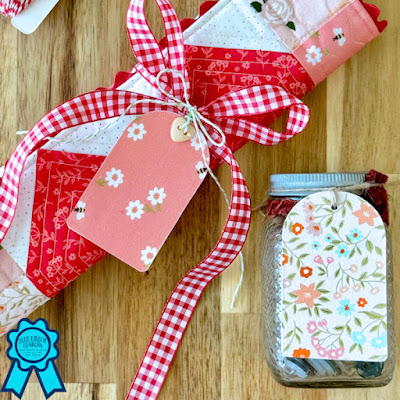
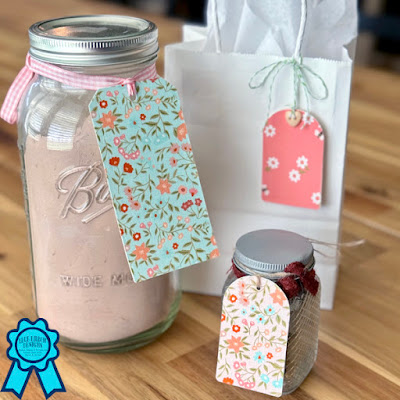
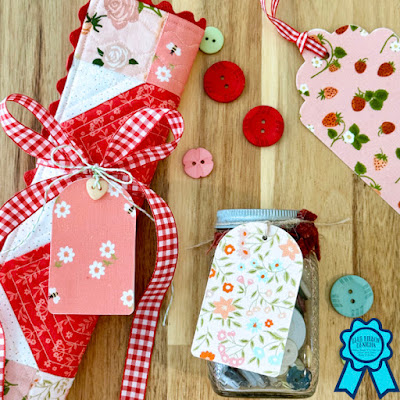
This is an easy project that can definitely be a scrap buster! It uses minimal supplies and is perfect for adding a handmade touch to your gift giving. You can use your favorite fabrics and/or fabric scraps to embellish and personalize gifts and taggable items. These no-sew fabric tags are perfect for gift bags, jars, packages, quilts, and handmade gifts. For this post, I used HeatnBond UltraHold Iron-On Adhesive, SpraynBond Pattern & Stencil Spray, and Pressing Paper Fabric and Craft Sheets...plus, I give you tips for using each of these items. I also used textured cardstock, baker's twine, gingham ribbon and buttons. Visit the tutorial post for a complete and detailed supply list.

To find the baker's twine, ribbon and buttons I used, along with other supplies/tools listed, visit my Nifty No-Sew Fabric Tags Supply List on Amazon (full disclosure: as an Amazon Influencer, I earn from qualifying purchases - I only share products I actually use - and I truly appreciate you shopping from my links, thank you!).

Nifty No-Sew Fabric Tags ©Copyright 2024 Belinda Karls-Nace/Blue Ribbon Designs, LLC http://www.blueribbondesigns.blogspot.com

Nifty No-Sew Fabric Tags ©Copyright 2024 Belinda Karls-Nace/Blue Ribbon Designs, LLC http://www.blueribbondesigns.blogspot.com

Nifty No-Sew Fabric Tags ©Copyright 2024 Belinda Karls-Nace/Blue Ribbon Designs, LLC http://www.blueribbondesigns.blogspot.com

Are you familiar with HeatnBond UltraHold Iron-On Adhesive? This product is perfect for "no-sew" projects. HeatnBond Ultrahold is paper backed, iron-on, no-sew, double-sided adhesive for bonding fabric without the need for pinning. Ultrahold’s no-sew bond is stronger than traditional fusible webs. The solid sheet adhesive means edge to edge coverage for appliqué shapes on quilts, wall hangings and attire without puckering or bunching. Draw or print directly on the paper backing to easily design appliqué pieces. This is another product that is a staple in my sewing studio...

If you have questions on any Therm O Web or HeatnBond/SpraynBond products or would like to see a specific type of product in one of my projects, drop me a comment or email.

You will have to visit the ThermOWeb blog for my complete tutorial and pattern, but I am posting a few photos here...

Nifty No-Sew Fabric Tags ©Copyright 2024 Belinda Karls-Nace/Blue Ribbon Designs, LLC http://www.blueribbondesigns.blogspot.com

Nifty No-Sew Fabric Tags ©Copyright 2024 Belinda Karls-Nace/Blue Ribbon Designs, LLC http://www.blueribbondesigns.blogspot.com

Here is a direct link to the project tutorial:

I hope this project gets you excited to create something special and unique...

I am creating monthly projects for the Therm O Web Blog and I will be sure to post here when I have a new tutorial available. My next project will be available on June 18th...and I am working on something fun for summer...

Thank you for stopping by for a visit today - I always enjoy sharing with you. Have a great week and make time to work on something creative...

Nifty No-Sew Fabric Tags ©Copyright 2024 Belinda Karls-Nace/Blue Ribbon Designs, LLC http://www.blueribbondesigns.blogspot.com

Tuesday, December 24, 2013

Fabric Gift Tag Tutorial

One of my favorite holiday projects this year has been creating fun fabric gift tags. I have been wanting to make some of these tie-on tags for a couple years and I finally made time to play in my sewing studio. I managed to make a handful this past week...then today, I decided I would make one more, so I could write a quick tutorial for you. This project gives you a chance to be creative and play fabrics, threads, and embellishments...and use a sewing machine...plus do a little hand stitching. I am actually a little addicted to these package tie-ons, which would be perfect for any occasion...in fact, I think I will be making some for future birthday presents! I used quality quilting fabric for the front and back of the tags and wool felt scraps for the main embellishments...I also added some trims, sequins, and tokens I had in my sewing room...and of course ribbon and/or baker's twine is perfect for attaching the tags to packages. The back of the tag can be used for personalizing...and, of course, each one would make a fabulous tree ornament!


First, you will want to cut your tag shapes from fabric - you will need two (one for the front and one for the back). I used a die cutting machine, but another option would be to print a tag template (a Google search will give you loads of options) and trace it on your fabric to give you a cutting line. I also cut two from a fusible lightweight interfacing - if you are cutting by hand, you will want to fuse the interfacing to the fabric before cutting your tags.

If you did not fuse the interfacing to the fabric before cutting, fuse it to your fabric now. Fuse the shiny, pilled side to the wrong side of your fabric using the manufacturer's instructions.

Next, decide the motif/shape you would like to add to your tag - for the example, I used a snowman cut from white wool felt - you could use fabric or any assortment of embellishments. I used a glue stick on the back of my felt shape to help hold it in place.

After deciding on the wool shape, I took the tag to my sewing machine for a bit of embellishment. I used dark sewing thread to cover the hat...then stitched some stick arms...and used a specialty stitch on my machine for the buttons. I also stitched around the entire snowman with a straight stitch using white thread. For all of the machine stitching, I used an open toe foot for better vision.

Use sewing thread or embroidery floss and a sharp needle to add the smaller details - for the model, I hand stitched the snowman's face (French Knots for the eyes, and straight stitches for the carrot nose and mouth).

Next, add any additional embellishments, such as: buttons, trims, sequins, brads, or beads. For the model, I added three snowflake sequins, using a sharp needle with transparent thread. If you want, now would be the time to embellish or personalize the back of the tag.

You are now ready to sew the front and the back of the tag together. Place the two tags right sides together, and sew around the perimeter, leaving an opening for turning. I did this on my sewing machine and and used about an eighth of an inch for the seam allowance, so I could keep the curvature of the tag - if your tag is not as fancy, a quarter of an inch seam allowance will work quite well.
                                 
                                        
The next step is to turn your tag right sides out...making sure to get all the corners and curves pushed out nicely (try using a pencil eraser or chopstick to make this step easier). Press, then machine top stitch around the entire perimeter, which will close the opening used for turning.

I used a grommet to strengthen the hole in the tag.

Run a decorative ribbon or length of baker's twine through the grommet hole for attaching to a gift.

Tie on your package for a perfect, personal, handmade touch!


I hope you have enjoyed this holiday tutorial...maybe it will prompt you to make a few fabric gift tags of your own. Happy holidays!