Greetings friends! It's NEW pattern day...so let's talk about Rosebud Manor. I had so much fun designing a creating my new pattern "Rosebud Manor" - a small quilt perfect for a wall hanging or table topper. This mini quilt has foundation pieced quilt blocks around the perimeter and a machine appliqué block in the center.
Rosebud Manor measures 28.5" x 28.5" and is great for showing off a favorite fabric collection. The simple foundation pieced quilt blocks around the perimeter lend themselves to fussy cut centers - putting a spotlight on a favorite print. The center machine appliqué block uses a touch of rick rack for embellishment and a tiny 1/4" button for the doorknob.
I used gorgeous fabric prints from the Elise collection by Terri Henson for Poppie Cotton - this fabric collection is brand new and is shipping to quilt shops in June. The background and binding are Country Confetti - this basic collection is also from Poppie Cotton.
The pattern is extremely detailed with foundation blocks provided I even include instructions for foundation piecing and machine appliqué. The pattern is 27 pages and full of color images and photos for every step. You can find it in both paper and/or digital format in my Etsy Shop.
I hope this new pattern inspires you to create a Rosebud Manor small quilt of your very own, using your favorite fabric collection...and if you do, I hope you will share a photo or two with me!
Greetings friends! It's NEW pattern day...so let's talk about my Sweet Sewing Book. It all started just playing around in my Studio in March...I was working with the Wildwood Dwellings Fabric Collection from Poppie Cotton and I wanted to show off the detailed motifs. I decided to create a log cabin quilt block that would work for a large needlebook cover and show off a fussy cut motif in the center. The project grew from there, adding several pockets and embellishments...and my Sweet Sewing Book was born. I shared photos and a video of it during the Wildwood Dwellings Fabric Tour and the response was so great, I decided to write a pattern.
My Sweet Sewing Book measures 8.5" W x 6.5" H when closed and 17" W x 6.5" H when open. It has a plethora of specially designed pocket to hold all sorts of hand stitching tools. It has wool blend felt needlebook pages for needles, pins, and a needle minder...and a pocket with ties for embroidery scissors. The largest pocket holds a Nurge Extra Small Square Embroidery Hoop. Dividers in the left side pocket are designed to hold embroidery scissors, a pack of needles, a Stitch Starter Ruler, and a pencil or seam ripper...and there is a hidden pocket behind the largest pocket. A triangular pocket holds thread bobbins or spools or any small tool needed close at hand.
A shank button and elastic provide a secure closure for the book and I enjoyed searching through my vintage buttons for the perfect match. For the models, I used a Goody Colored Hair Elastic to coordinate with the fabrics, but a regular piece of elastic would work just fine. I used Wool Blend Felt from Benzie Design for the needlebook pages and Hand-Dyed Twill Tape from Lady Dot Creates for the scissor ties. If you want to add the sweetest pins, as I did, you must check out Puntini Puntini - they are my favorites! I also used fussy cut motifs from my fabric choices to embellish the inside front cover and needlebook pages.
The pattern is extremely detailed with foundation blocks provided for the cover and I even include instructions for foundation piecing. The pattern is 15 pages and full of color images and photos for every step. You can find it in both paper and/or digital format in my Etsy Shop.
...and here are photos using the House and Home Fabric Collection by Michal Marco for Poppie Cotton...
I hope this new pattern inspires you to create a Sweet Sewing Book of your very own or as a gift for a very special friend...and if you do, I hope you will share a photo or two with me!
Greetings friends! Thanks to your wonderful feedback on my last post, I have written a quilt pattern for "Patchwork in the Heart." A wonderfully scrappy mini quilt that can be used as a wall hanging or table topper. This quilt measures a manageable 24.5" W x 24.5" H and the pattern includes tips for making it larger or smaller. The pattern contains comprehensive/detailed instructions with all sorts of color diagrams...and it includes basic instructions for fusible machine appliqué. This 8-page pattern is designed to easily use scraps or your favorite fabric collection - it is mini charm pack friendly, and is good for all skill levels. You can find this new design in my Etsy Shop, in both paper and digital format...
I designed this quilt for a Poppie Cotton Valentine's Day feature. This month Poppie Cotton is spotlighting their fabric ambassadors with projects from the heart. Many of you know that I have been blessed to work with Poppie Cotton for years and have created with almost every single collection they have released...so I came up with a special project to highlight a large selection of prints. One of the things I love about this quilt is, it can be as planned as you want OR as scrappy as you want (like I made mine). I used pink and red fabric scraps from almost 40 Poppie Cotton collections, along with 3/8 Yard Country Confetti (Marshmallow New White CC20190) for background and 1/4 Yard Country Confetti (Cotton Candy Dark Pink CC20181) for binding - plus HeatnBond Fusible Fleece, HeatnBond Lite (fusible web) and backing. I used HeatnBond Tear-Away Stabilizer Sheets to stabilize my heart blocks during the appliqué process...and SpraynBond Basting Spray to baste the backing in place for quilting. Visit my YouTube Channel for a short video tutorial: https://www.youtube.com/shorts/mxWtxlYbeqo
You can also find the exact supplies I used (including the black wrought iron quilt hanger) by visiting the feature post in my Amazon Shop (note, as an influencer, I earn from qualifying purchases).
Thank you so much for visiting with me today and checking out my latest quilt pattern. I will be back soon with a peek at a new cross stitch model...and a seasonal project tutorial that I just completed for Therm O Web.
For now, I am back to the studio...I am working on a plethora of new designs and ideas. Of course I will be celebrating the Super Bowl tomorrow (well, actually later today - this crazy night schedule) with close friends...rooting for our local Kansas City Chiefs! Since my birthday always falls on or near Super Bowl Sunday, we will be celebrating my birthday (a few days early) at our Super Bowl party and having cake! 🎂 If our Chiefs can pull off the 3-peat, the parade will take place on my birthday...fingers crossed! I'll be wearing my number 10 jersey tomorrow for good luck...🏈💛❤️
Greetings friends - happy February! You are visiting on a great day - I have a heart-filled project to share with you…my "Patchwork in the Heart" scrappy mini quilt. Poppie Cotton is sharing Valentine projects this month while spotlighting their fabric ambassadors....and if you follow them on social media, then you are aware that today the spotlight is on me.😊 Many of you know that I have been blessed to work with Poppie Cotton for years and have created with almost every single collection they have released...so I came up with a special project to highlight a large selection of prints.
“Patchwork in the Heart” measures 24” x 24” and every single fabric in this quilt is unique. There isn’t a pattern, I just made it up as I went along – a pattern could definitely be created, if there is some interest (drop me a note or comment if you would like to see me write a pattern). I cut 2.5” squares from all the pink and red prints from at least 36 different Poppie Cotton Collections - there are 144 prints represented in this quilt, plus Country Confetti for the background and binding. I made 36 4-Patch blocks, cutting half of them into hearts for fusible appliqué – then alternated the appliqué blocks with the remaining 4-Patch blocks. It is kind of an “I Spy” quilt of Poppie Cotton fabrics. I added hanging tabs…or it can be used as a table topper.
I think I cut 182 unique 2.5” red and pink prints, so I had a few remaining squares that I used to create this cute project bag. I made another appliqué heart block and inserted it into the patchwork. I used a cheerful Poppie Cotton pink daisy print on the back, with a white zipper and pink zipper pull.
There will be a reel on my Instagram page that shows the assembly of my mini quilt…with a longer version on my YouTube channel...look for these on Wednesday evening.
I hope you have been inspired by this mini quilt, stitched with love, and filled with Poppie Cotton history. Thank you for visiting and sharing my passion for all things created with needle and thread!♥️
Greetings friends! I wanted to stop by today with a little Halloween fun. It has been a bit hectic here since I returned from traveling abroad, but I will be back to share about my trip very soon (it was an amazing journey). I have been playing catch-up since arriving home, but managed to make a little time for Halloween sewing. I needed a little "play time" in my sewing studio, so I took my "Sweet Snacks Mug Rug" pattern and adapted it for Halloween, using scraps of fabric from Sweet Tooth by Elea Lutz for Poppie Cotton.
I followed the pattern, but decided to remove the heart and steam stitches and add a ghost as the "steam." The ghost was free-form cut without a template and is not a part of the pattern. I applied HeatnBond Fusible Interfacing to the back of a piece of white fabric (this helps to keep the background fabric from showing through - I wanted it to look like steam, so a little background showing through is good, but I wanted my ghost nice and white). Next, I fused HeatnBond Lite Adhesive to the back (I used a piece leftover from the sheet I printed the teacup templates on). I then used a pencil to draw a free-form ghost and cut it out. After machine appliquéing the pieces in place, I hand stitched the ghost eyes and mouth, using French knots for the eyes and straight stitches for the mouth. I was super happy with the results!
My Sweet Snacks Mug Rug pattern is perfect for seasonal sewing and gifts...is beginner friendly...and is great for using up scraps. I can't wait to make some in holiday prints - I am thinking of adding a gingerbread cookie!
You can find a video tutorial reel on my Instagram page, with a longer version on my YouTube channel. You can also find a list of the project products I used in in my Amazon Shop: https://amzn.to/4f7Vycx (note: as an Amazon Influencer, I earn from qualifying purchases - thank you for visiting!).
For all sorts of creative Halloween finishes, visit my Instagram page (https://www.instagram.com/brdgirl/), where I have been sharing images and videos all month long!
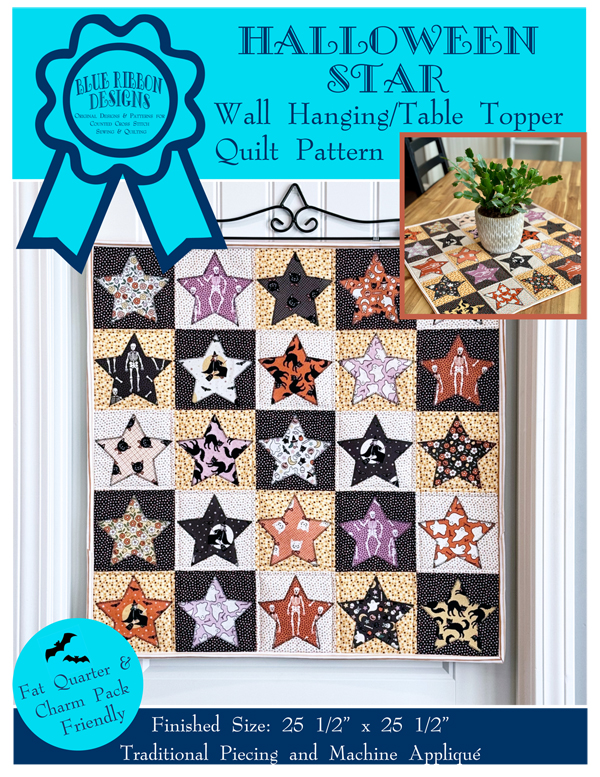
Greetings friends - happy Friday. This VERY early morning, I am back with another brand new quilt pattern release. Those of you who follow my blog and my Poppie Cotton Fabric Tour posts will recognize this quilt. I had a lot of messages asking for a pattern for this design...so without further ado, here is "Halloween Star!"
“Halloween Star" is machine appliqué, along with traditional piecing and assembly...and the pattern is available in both digital and paper format. It measures 25.5" x 25.5" and works perfectly for a wall hanging or table topper. The pattern contains basic machine appliqué instructions, appliqué template, and comprehensive/detailed instructions with color diagrams...AND is super quick and easy to create. This 9-page pattern is designed to use pre-cuts or scraps and small pieces of fabric...or would work great with your favorite fabric collection. This project is suitable for beginners or those wanting to dabble in appliqué....and is perfect for seasonal sewing and gift giving! It is easily adaptable to a larger size by adding borders or additional fabric squares.
The fun advantage to this quilt is you can use different fabrics for different effects - here are a few suggestions:
Christmas fabrics for a holiday quilt
Red, white and blue fabrics for a patriotic quilt
Traditional fabrics for a primitive quilt
Modern fabrics for a more abstract quilt
Juvenile fabrics for a baby quilt
I hope to make several samples of this adaptable quilt to show off some of the options!
I hope you will spend a little time in your sewing space making a "Halloween Star" quilt that fits your personality and decor...just think, if you start now, it will be ready before Halloween (or Christmas, if you make a "holiday star" quilt)! I do have a very sweet "mom-to-be" in my life, so I may need to make one with juvenile fabrics for a baby quilt...
For now, I am back to my design table and sewing studio - I am finishing up two more quilt patterns for the upcoming Cottage Charm Fabric Tour (stop back on Friday, July 5th)...plus I have a new cross stitch model in the works in my stitching nest...and I am in the process of sewing some patchwork project bags for my Etsy shop. So many projects and deadlines and so little time...❌❌❌
Greetings friends! It is new project tutorial day - time to share my June project created for Therm O Web with you! I always enjoy putting on my Fabric Education Designer hat and creating new projects/tutorials to share with you on the Therm O Web Blog. Each month, I share a new project and you give you my tips and tricks for using their adhesives and interfacings. For the month of June, the blog is focused on projects for travel, camping, summer appliqué, and scrappy solutions. I created a brand new project that was posted yesterday - it is a complete project tutorial for my "On-the-Go Stitching Portfolio." My comprehensive tutorial contains a complete supply list, printable pattern with templates, and step-by-step directions with color photos (and you can find a short video on my YouTube channel and Instagram page. This is a fun, summertime project...and works great for organizing and traveling with a handwork project. I chose some cheerful colored fabrics from the Waved collection by Erin Borja for PBS Fabrics. I hope you will stop by the Therm O Web Blog and check out my project and tutorial...
This is an afternoon project that can definitely be a scrap buster! You can use your favorite fabrics and/or fabric scraps to create your own portfolio. This stitching case will easily fit in a project bag or tote or purse and can even hold a half-sheet (5.5" x 8.5") pattern. For this post, I used HeatnBond products (Fusible Fleece, Medium Weight Interfacing, E-Z Print Iron-On Adhesive Sheets, and Lite Iron-On Adhesive Tape)...plus, I give you some pro-tips in my post. I also used gingham ribbon and wool blend felt. Visit the tutorial post for a complete and detailed supply list.
To find the ribbon and wool blend felt, along with other supplies/tools listed, visit my On-the-Go Stitching Portfolio Supply List on Amazon (full disclosure: as an Amazon Influencer, I earn from qualifying purchases - I only share products I actually use - and I truly appreciate you shopping from my links, thank you!)
Are you familiar with HeatnBond Lite EZ-Print Iron-On Adhesive Sheets? I use these for almost every project I create with appliqué. HeatnBond Lite EZ-Print Iron-On Adhesive Sheets are paper backed, iron-on, sewable, double-sided adhesive for bonding fabric without extra weight or stiffness - and the best part?? - they measure 8.5" x 11" to fit in a standard inkjet printer - NO TRACING INVOLVED! The templates I provide for each of my projects are printed on 8.5" x 11" paper, so you can print the templates directly on the HeatnBond Lite Adhesive sheets and skip the tracing step. I always have these stocked in my sewing studio!!
If you have questions on any of the Therm O Web or HeatnBond/SpraynBond products or would like to see a specific type of product in one of my projects, drop me a comment or email.
You will have to visit the ThermOWeb blog for my complete tutorial and pattern, but I am posting a few photos here...
I hope this project gets you excited to create something special and unique...
I am creating monthly projects for the Therm O Web Blog and I will be sure to post here when I have a new tutorial available. My next project will be available in July (I don't have the date yet)...and I am working on another fun project for summer...
Thank you for stopping by for a visit today - I always enjoy sharing with you. Have a great week and make time to work on something creative...