Tuesday, January 31, 2012

You Are Loved Giveaway

I recently hosted this giveaway for Facebook fans - it was so much fun, I decided to repeat it here on my blog...

To show you (my blog followers and friends) how much you are loved - it's a Blue Ribbon Designs giveaway! The prize?? - a trio of Blue Ribbon Designs needlework charts - "In My Heart", "Hugs & Kisses", and "Stitched With Love".

To enter, simply leave one comment on this post - all comments will go into a random drawing where one fan/follower will receive this special three-pack of design charts.


Fine print:
  • Giveaway is open until 11:59 PM Saturday, February 4, 2012.
  • International entries welcome.
  • All entries require a valid email address. Please make sure your email address is visible in your profile (so I have a way of contacting you, should you be randomly chosen) - if you are uncertain or post "anonymously", please leave your email address with your comment - entries without a valid email will be disqualified.
  • No chart substitutions.
  • E-mail entries will not be accepted, you must leave a comment on this post.
  • One comment per person; multiple comments will be deleted/disqualified.
  • One recipient will be announced on Sunday, February 5th.
There you have it - all the "You Are Loved" giveaway details...I am happy to be able to thank those who continually follow my blog and leave encouraging and enthusiastic comments! I hope my future posts maintain your interest and inspire you... Good luck to all!

Monday, January 30, 2012

Valentine Needlebook Pincushion Tutorial

Today's Valentine project is quick and easy and will definitely brighten up your stitching nest! It is a pincushion with needlebook attached...and is easy peasy. I was inspired by a Valentine sachet I recently pinned to one of my bulletin boards on Pinterest. I was going to do a photo tutorial for you - but I realized it is pretty simple and really doesn't require one...

The supply list is minimal:
  • 5" x 6" piece of cotton print fabric (pincushion top)
  • 5" x 6" piece of coordinating wool fabric (pincushion bottom)
  • three pieces of coordinating wool fabric for the heart-shaped needlebook pages (approximately 3 1/2" x 3 1/2")
  • matching sewing thread
  • your favorite "stuffing"
  • Optional - one 5" x 6" piece of fusible lightweight interfacing
  1. Take your 5" x 6" piece of cotton print fabric and fuse a piece of lightweight interfacing to the back - this step is optional - it gives the top of your pincushion a good "sturdiness" and keeps it nice and smooth. It also helps your pincushion hold up over time with excessive puncturing. Set aside.

  2. Using your three pieces of of coordinating wool fabric, cut three hearts. I used my AccuQuilt Studio fabric cutter to cut three of Heart #8 Small....but you can easily cut these using your own template. Choose the order you would like to layer your wool hearts; leave the base full-size - trim the middle heart 1/8" smaller - trim the top heart 1/4" smaller, so once stacked you will see all three colors. My base heart is approximately 3" x 3".

  3. Place the stacked wool hearts in the center of your piece of cotton print fabric (right side up). Sew down the center of the stack of hearts - from the heart valley to the heart point. I used a decorative flower stitch on my sewing machine, but this could be done by hand using a long sharp needle.

  4. Place the 5" x 6" piece of coordinating wool fabric on top of your cotton print with wool hearts (right sides together).

  5. Stitch around the perimeter with a 1/4" seam allowance, leaving an opening for turning.

  6. Trim the corners, and then turn right side out.

  7. Stuff firmly with your choice of filling - I used a good quality fiberfill.

  8. Whip stitch the opening closed.
...and there you have it - a quick and easy Valentine pincushion with a needlebook attached (finished size 4 1/2" x 5 1/2"). I used my sewing machine for all the sewing, but you could easily put the entire project together by hand. I added some decorative pins - the three red hearts are from Puntini Puntini (http://www.puntini-puntini.blogspot.com/ and http://puntinipuntini.splinder.com/) - Paola makes the most fabulous decorative pins - they make me happy and are the perfect addition to my new treasure!

I hope you have been inspired to make your very own pincushion....

Tomorrow I will post details on a Valentine giveaway...so if you like my cross stitch designs, please stop back tomorrow to get in on the fun....

Sunday, January 29, 2012

Sweet Simple Snack Mats

I spent my Sunday morning at the sewing machine working on some patchwork snack mats (or what some of you may call "mug rugs")...I wanted to use some cute scraps of Valentine fabric (Candy Kisses by Sandy Gervais for Moda) I had in my vast collection of fabric bits and pieces. Some of the pieces were rather small, so I decided to cut 2" squares - this was a quick task using my AccuQuilt GO! fabric cutter. After cutting 75 squares, I started laying them out in sets of 5 x 5 (25 squares to a mat). I then used a fun way to piece them together - I fused the 25 squares to a 10" x 10" piece of fusible lightweight interfacing - then pieced them together from the wrong side - it works really slick for small pieces of fabric. I decided to attach jumbo rick rack around the perimeter of each before adding the batting and backing. Once they were turned and pressed, I top stitched around the entire perimeter -the finished size is 7.5" x 7.5". I was very pleased with the results...and very happy to spend my quiet morning being creative in my studio! These cute little quilted mats are all the rage right now...perfect for sprucing up an afternoon snack...and there are so many fun variations - I have been wanting to make some for a while and chances are I will be making more with different fabric scraps....

The rest of my afternoon and evening will be spent working on those Halloween designs I mentioned to you yesterday - I have a lot of stitching and designing to do!

...and one more note - I recently hosted a Valentine giveaway on my Facebook fan page and it was so much fun, I decided I would have another chance to win here on my blog....details will be posted in the next couple days. If you like my Valentine charts, this is a giveaway you won't want to miss...

Saturday, January 28, 2012

Pretty Pink Pouch

It has been a crazy week...and I am happy to say my three new designs (for release at the TNNA Needlework Market in February) are finally in printing production....I do have photos and details to share with you in the coming week or two, so I hope you will look forward to those posts. Believe it or not, I am currently working on a couple new Halloween designs - one is a class piece for the New England Stitcher's Retreat in October...and one is for a Just Cross Stitch special publication - yep, I am designing and stitching Halloween in January.

This afternoon, I did take time out to do a wee bit of sewing - you know me, if I don't turn on my sewing machine at least a couple times a week, I go through withdrawal - I get the shakes and start to sweat...so today it was time to take a break. I really wanted to work on something with a Valentine feel to it...and I was dying to try a couple new dies for my AccuQuilt Studio fabric cutter (Flowers #3 Mini , and Heart #8 Small). I decided to pull out my wool scraps and just make things up as I went along. I started with a pretty pink wool base approximately 8" x 12"...and this pretty pink pouch was created (finished zipped-up size 7.5" W x 6" H). While you could easily attach the heart and flowers by hand, I chose to use my machine (after-all, I have been hand stitching continuously for weeks). I did add the button and the little white daisy (a tiny flower I cut from some trim) by hand. I thought about adding some rick rack trim, but then had the idea to cut the two raw edges that surround the zipper with a scalloped blade in my rotary cutter and use a contrasting zipper - which I thought turned out splendidly! I also added a little wool zipper pull using the same color red as the heart appliqué. It was a fun afternoon project and brightened my spirits...and it also sparked some creativity for a near future project that will use more wool and cotton quilting fabric.

Monday, January 23, 2012

Betty Ring Auction at Sotheby's totals $4,389,503

Hello friends - Happy Monday!

I received quite a few emails and messages about the post I did last week on the Betty Ring Sampler Collection and auction, so I thought I would post a quick update this morning.

The Important American Schoolgirl Embroideries; The Landmark Collection of Betty Ring auction concluded on Sunday - totaling $4,389,503 – exceeding the pre-sale high estimate of $3.4 million. A new record for any needlework sampler at auction was set when the needlework sampler Mary Antrim, Burlington Country, New Jersey, Dated 1807 (shown right) achieved $1,070,500 - more than ten times its high estimate of $120,000. This breathtaking sampler (lot 616) was worked in silk and painted paper on linen - it is 17" x 16./75" - and was in the original frame - incredible!
Lot 503 -Susannah Saunders, Sarah Stivours School, Salem, Massachusetts, Dated 1766 - $314,500 (high estimate $80,000)

Lot 508 - Betsy Gail, Marblehead, Massachusetts, circa 1790 - $170,500 (high estimate of $60,000)

Lot 625 - Sarah Cooper, attributed to Ann Marsh’s School, Philadelphia, Pennsylvania, Dated 1792 - $170,500 (high estimate of $80,000)

Lot 586 - Hannah Carlile, probably Mary Balch's School, Providence, Rhode Island, Dated 1796 - $122,500 (high estimate of $60,000)

For those of you interested in complete sales results, Sotheby's has posted a PDF with details.

....and if you haven't had a chance to view the entire collection, it is still available online by visiting the Sotheby's website - click on the links below to see this incredible collection of historic needlework from the comfort of your own home:

Sotheby's Electronic Catalog
American Needlework Treasures by Betty Ring
Girlhood Embroidery Volume 1 by Betty Ring
Girlhood Embroidery Volume 2 by Betty Ring

Again, please allow time for the books to load - these are complete (highly sought after) works - they are filled with lovely color (and black and white) photographs and very detailed information. There is no telling how long Sotheby's will have these available for viewing, so take advantage of this AMAZING online exhibit before the files are removed.

Thursday, January 19, 2012

Sewn With Love

Things have been a little bit hectic here to say the least...I have been stitching my days away, working on new designs for market release - I've been designing two new class pieces - and I've been working on several magazine designs...all that leaves little time for sewing (especially when I have been under the weather). I put the final stitches in on "Redwork Garden" last night (I'll share it with you very soon!) and it made it to the framer today - we had picked the molding last week and it should be finished up tomorrow...so with that HUGE project completed, I decided to take a little "me time" this afternoon and quilt and bind this very fun Valentine table runner.

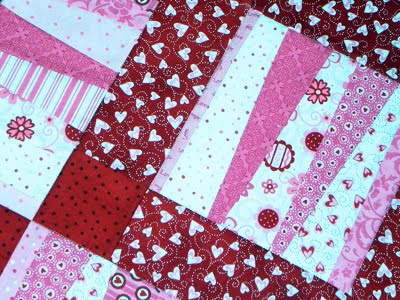
This strippy table runner was such a treat to work on...I really enjoyed the entire project. I used the pattern "Strippy Table Set" by Patterns by Jean Boyd...and the fabric is mainly from the collection Sent With Love by Deb Strain for Moda (this is a Valentine line from last year). This is a Jelly Roll (2 1/2" strip) friendly pattern, for those of you with leftover strips in your stash...and making it extra awesome - the wedge shaped pieces are not cut to an exact shape - you just cut them quick and easy with your rotary cutter (this gives it an even more "scrappy" look and makes it SO simple). The sashing/border strips and cornerstone squares were all cut with my AccuQuilt GO! fabric cutter (but could easily be done with a rotary cutter)...making this a great beginner project for those of you just learning (or wanting to learn) to quilt. The finished size is approximately 31" x 31"...and the pattern includes directions to make matching place mats (which I would definitely make if there were more hours in each day!). I can see this table runner and place mats done with all sorts of different fabrics...especially autumn fabrics...wouldn't it make a lovely Thanksgiving table setting?!

So now that I have had a little playtime, it is back to work - I have to finish stitching some needlework smalls, so they will be ready to put together tomorrow...I have photography to get done...and I have a long list of details to complete in order to get my three new designs to the printer early next week. I can't wait to share the new designs with you...and then start stitching on class designs for this fall...so many fun new things are on the horizon...

Monday, January 16, 2012

The Betty Ring Sampler Collection

I know I have been absent for a couple weeks...and I apologize for the break. The TNNA Nashville Needlework Market in February is fast approaching and I have been swamped trying to prepare three new design releases - I have been busy stitching, finishing, and preparing the print files....and of course, with everything going on and my hectic schedule, I contract a miserable sinus infection/head cold...ugh. I spent the last several days recuperating, taking it easy (which is extremely difficult for me) and nursing myself back to health. Good news is, today I woke up and was somewhat able to breathe through my nose, so I am happy...and hopefully I'm on the road to recovery. So before getting back to my HUGE to-do list, I thought I would do a quick blog post and let you know I am still here...

Many of you are fans of historic needlework and schoolgirl samplers....and if you are, there is a good chance you are familiar with Betty Ring - a scholar, author, and collector of American Schoolgirl Embroidery. Her reference books in the field are highly collectible and showcase her almost 50-years of research, scholarship and connoisseurship in the field of girlhood embroidery. You may (or may not) be aware that the sampler collection of Betty Ring will be auctioned in New York City this month and is currently on display at Sotheby’s from January 14-22; you can currently view the collection as if it were a museum exhibition. Needlework industry fans and professionals are traveling from around the globe to view this definitive collection and bid on 197 different works of needlework art.

Now, if you are like me, you aren't able to travel to New York City this month...but that should not stop you from viewing Betty Ring's landmark collection of schoolgirl embroideries...you can view the entire collection online - through the Sotheby's electronic catalog and three of Betty's highly sought after reference books. Click on the links below to see this incredible collection of historic needlework from the comfort of your own home:


Please allow time for the books to load - these are complete works - they are filled with lovely color (and black and white) photographs and very detailed information. There is no telling how long Sotheby's will have these available for viewing, so take advantage of this AMAZING online exhibit before the files are removed. I am blessed to have each of these books in my personal collection and I could still spend hours perusing (and drooling over) each of the pages. I hope you will visit the above links and be inspired and educated by all it has to offer....

Wednesday, January 4, 2012

Playtime in Black & White

Over the holidays, my sewing studio got a (FABULOUS) brand new addition....an AccuQuilt Studio Fabric Cutter. I have been going crazy trying to make time to play with it - I have a bunch of BRD deadlines and a HUGE pile of design work/model stitching to accomplish, so making time to "play" has not been easy....I try to use "playtime" as a reward for accomplishing a big task on my to-do list. While I was working on my holiday gifts, I did manage to use it a couple times, using some GO! Dies and the GO! Die Adapters for the Studio - which actually worked very well...but I wanted to try an actual Studio Die. So, yesterday, after completing a pile of work, getting in a 3.25 mile walk with Simba, and getting my household chores done, I decided to do a little playing and sewing.

I used the Studio Everyday Tote Die which actually works pretty slick - it cuts a 9" x 11" boxed bottom tote bag...how you ask??...well, it only cuts the actually bag base - you cut the handles and pockets and/or embellishments separately...but it gives you a great basic bag to build upon. You decide the type of fabrics and if you want to add batting or interfacing...or if you want to quilt it or use quilted fabric....the possibilities are endless! I decided to make several pockets for my bag - two for the outside and one for the inside...and I used quilted fabric for the outside and handles and cotton fabric for the lining (just a couple pieces I had in my stash to experiment with). This die is a breeze to use (at least for me), as I have made many tote bags in my sewing career - in fact, I didn't even use the instructions except to see how to fold and line up the fabric before cutting...and the entire project took less than two hours from start to finish. The tote you are seeing in my photos is my very first one using my new fabric cutter and die...pretty basic...but I have some fabulous ideas for future bags...and several will be upcoming gifts! My next one will have a button/loop closure and slightly shorter handles....and maybe even a little applique...I am full of creative ideas on how to use this particular die! I can definitely envision piecing and quilting some cute fabrics or scraps for the outside bag, then using a cotton for the lining and handles. ...and, as I begin to collect more of the Studio Dies (right now I only have a couple), I am sure I will have more projects to share with you!

For now, it is back to stitching on my model for "Redwork Garden"...it is coming along very nicely and I have the entire floral borer stitched...I still have about a 1/3 of the design left to complete...but I am hoping to have it finished sometime in the next week....look for updates later in the month!

Sunday, January 1, 2012

A New Year Bright With Promise

As we welcome the new year, I am taking a look back at the last 365 days...2011 was a good year for Blue Ribbon Designs - a year of triumphs, challenges, and rewards. Thank you for making my success in 2011 possible and for your support, encouragement, and loyalty - there are many talented designers and teachers out there...and a vast amount of needlework patterns to choose from - I sincerely thank you for welcoming my designs into your stitching rotation and allowing my dream to be a reality. I truly love the needlework industry and I hope you will continue to receive my designs with open arms and share in my passion for all things done with needle and thread. As we jump into 2012, I have many goals and a good amount of projects in the works - a pile of design ideas, multiple classes across the US, and exciting plans for the future. Thank you for following me on my creative journey...

Here is a little treat for your New Year's Day - a tiny peek at my upcoming design "Redwork Garden"...I have been busy working on this new piece, which is a companion to "Quilted Garden" - I have plans to release it at the Nashville Needlework Market in February. At this time, I can tell you it is stitched on Lakeside Linens (Chantilly Creme) with three colors of Gentle Art Sampler Threads. I am hoping to have it finished up in the next week or so...and then off to my framer. Look for more information/details and photos in the coming month...

Thank you kindly for visiting/following my blog - I hope to keep you excited and inspired throughout 2012! Here's hoping your new year is bright with promise, filled with hope, and blessed with happiness and joy!